
Zoom Recordings
The Zoom videos fall under the new UBC video retention policy that will come into effect in October 2023. All Zoom recordings will automatically be deleted one year after they have been created with a UBC account. Therefore, it is recommended to move them to UBC’s media platform Kaltura which is intended for long-term video storage.
How to Access and Download Your Zoom Recordings | How to Upload the Recordings to Kaltura | How to Embed and Share the Recordings through Canvas
How to Access and Download Your Zoom Recordings
When you record the meeting or class on Zoom, there are options to record and save to the cloud or to save locally to your computer.
If the recording is saved to the cloud:
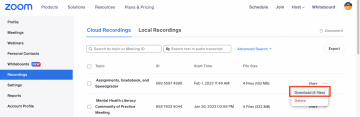
- Log in to ubc.zoom.us/recording with your UBC Zoom account.
- A list of available recordings can be found on the Cloud Recordings tab.
- Click on the three-dot icon on the furthest right of the row for the recording.
- Click Download from the drop-down menu.
If the recording is saved locally on your computer:
- Locate the saved recording files on your computer
Note: If any videos you intend to share outside of the course contain student audio or video, you must either edit out the students from the recording or obtain student consent to share it.
How to Upload the Recordings to Kaltura
- Log in to https://learning.video.ubc.ca/ with your CWL.
- Click + Add New.
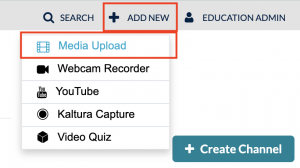
- Select Media Upload.
- Click Choose a file to upload.
- Select the file (usually a .mp4 file) you wish to upload from the file manager.
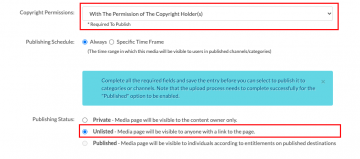
- Select the proper permission from the Copyright Permissions drop-down menu.
- With The Permission of The Copyright Holder(s) – Select if you have created the media or recorded the video yourself.
- The use of the materials falls within the Fair Dealing Exception – Select if the media qualifies under the Fair Dealing Exception.
- The material is in the Public Domain – Select if the media is in the public domain (i.e., YouTube).
- Other – Applies for cases outside the above uses that require additional explanation.
- Select Unlisted for the Publishing Status.
- Click Save.
How to Embed and Share the Recordings to Canvas
After the recording is uploaded to Kaltura, you can share it in Canvas by adding the video to Media Gallery of the course and/or embed it in Canvas using the Rich Content Editor.
Media Gallery is a course-level media repository in Canvas that creates a searchable gallery of media that is available to everyone in your course, and students are able to access the media by clicking Media Gallery on the course navigation menu. The video can also be embedded as course content in any place that has a Rich Content Editor in Canvas, such as a page, assignment or announcement.
Embed in Course Content:
- Log in to your Canvas course.
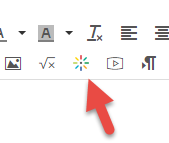
- In Rich Content Editor, click on the Embed Kaltura Media icon (the multicolor icon).
- Click on Embed next to the video you want to share. Wait for the video to appear (it may take a few seconds).
- Click Save to save your changes to that page without publishing it or Save & Publish to save any changes and make the page visible to students.
Add to Media Gallery:
- Log in to your Canvas course.
- Click on My Media on the course navigation menu. You will see a list of uploaded videos.
- Click on the pencil icon to the right of the video title.
- Click on Edit from the Actions drop down.
- Check to make sure a Copyright Permission is selected.
- Click Go to Media.
- Click on Edit from the Actions drop down.
- Select Published.
- Select the course(s) you want the video to be shared to.
- Click Save.
If you do not see the Media Gallery option on the course navigation menu:
- Go to Settings in the course navigation menu.
- Select the Navigation tab.
- Find the Media Gallery menu item, click the cog (gear) icon, and choose Enable.
- Click Save at the bottom of the page to update the course navigation menu.
Note: Instructors are not able to test the visibility of Kaltura videos in course content or in the Media Gallery course repository using “Student View”. This absence is due to a technical quirk of the Canvas “Student View” feature, and it does not mean the videos are unavailable to students. If you wish to confirm the student view of your videos, please contact ETS.
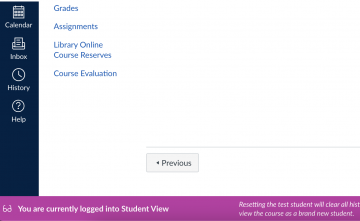 Browse in “Student View” Feature
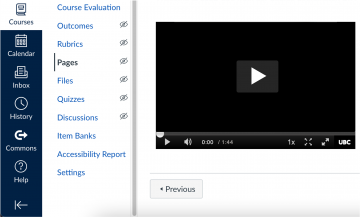 Browse in Teacher’s View
Additional Resources
- How to edit media with Kaltura in Canvas
- Enabling captions in Kaltura
- Recording an in-person lecture with Zoom